Trailer Brake Controller installation
The Brake Controller is used to operate the electric brakes on your caravan or large trailer.
The controller is wired to the brake lights or brake light switch on the car to tell the controller when you are applying the brakes. Then using inertia sensors most modern controllers will alter the amount of power sent to the caravan brakes. Most modern controllers are not sensitive to what direction they are mounted facing as the inertia sensors are fully electronic. In the good ‘ol days they actually used weights that moved forward under braking to apply the braking power to the caravan. So if the unit was sideways, upside down, too much of an angle etc, the sensor did not work.
In addition, there will be a control system (knob, buttons etc) to preset the braking level, a starting point or a maximum braking level, and a way of manually operating the brake in an emergency.
We should ‘brake’ here and discuss the emergency part. The manual over ride control allows the driver to manually operate the trailer brakes only, without activating the tow vehicle brakes. This is used mainly to quickly pull a swaying caravan back into line. Applying the tow vehicle brakes will most likely exacerbate the situation prompting a severe and unrecoverable sway event that leads most likely to a roll over. By law, this over ride control MUST be in an easily accessible location for the driver (for obvious reasons!). The over ride on the Red Arc Tow Pro is activated by pressing the middle of the control knob. Turning the knob adjusts the preset level of the braking.
The installation must be on a firm mounting, you don’t want it able to move around or vibrate too much, otherwise the inertia sensors will not work properly.
Our current vehicle had an early version Red Arc Pro V2 controller and they had mounted the main unit in the drivers side kick panel and attached it to only the wiring looms running through there. The control knob they had located on the lower right side of the dash and it was hidden from normal view by the steering wheel. The controller was able to move around over bumps and probably under its own weight when braking; and the control knob was not able to be seen to easily/quickly activate in the case of an emergency.
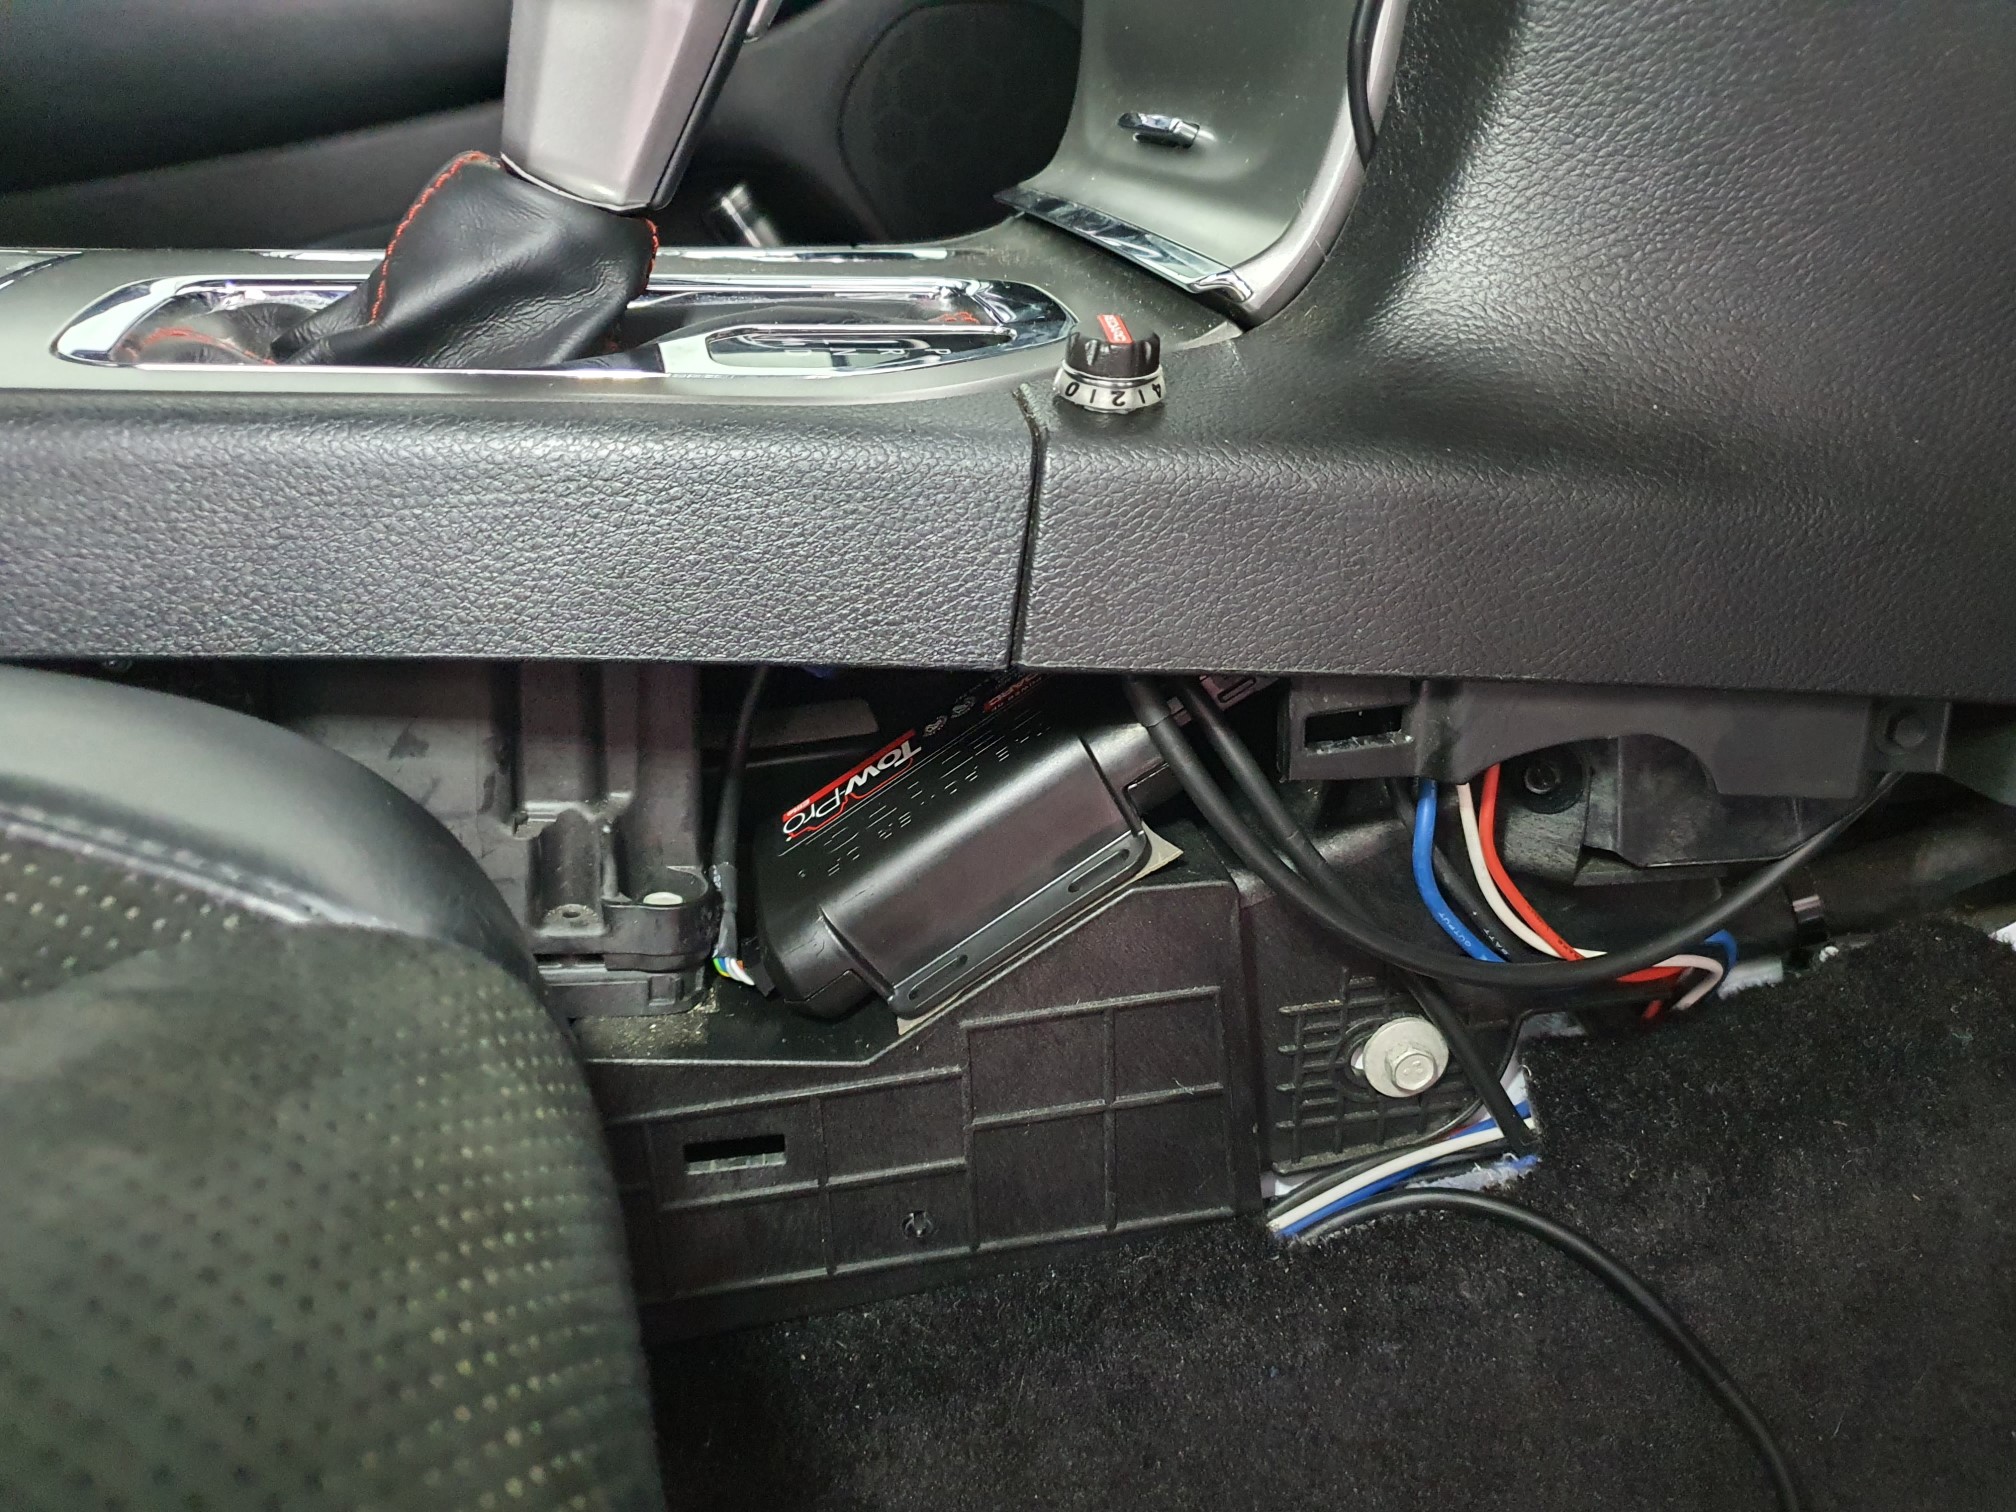
To make this a better installation, I have upgraded to the latest Tow Pro Elite V3 and have relocated the controller main system to a solid mounting position under the centre console. At the same time I relocated the control / over ride knob to an easy to see and reach position on the centre console.
Testing shows the system now operates much better and I can both easily see and reach the control knob.
The controller is then wired through the 7/12 pin connector to the caravan. Another tip there is regularly check the condition of the pins and socket for corrosion and squashing. The pins have a slit in them that with regular wiggling to plug/unplug will slowly close together and provide a poor connection. This can lead to the lights or brakes not working properly, or in the higher current pins like a battery charging or fridge power cause them to overheat and melt the surrounding plastic. A simply fix is to use a sharp pocket knife and gently push it into the slit to prise the pin apart slightly. The slit should be the same width all the way along the pin (as in not closing together or spreading apart)

Marvin the Martian overlooking for safety…



To make the adjustable actuator for the TowPro more visible and accessible to the passenger and driver, we should probably be mounting it in the top panel of the centre console, in the area directly in front of the drive mode selector knob (Snow, Sand, Auto, Mud, Rock)
Hey John, I have seen a few mounted there, I did think about it but too easy to bump in my opinion. It was located next to the headlight control, couldn’t even see it due to the steering wheel! Where it is now, in front of the gear shift, is in very easy reach of the driver and easy reach of the passenger, but not in a spot you would accidentally hit it.