

Jeep Lights
I recently had to update the headlights on the Jeep after the passenger side factory original HID globe failed. After a lot of searching and asking questions, I settled on the Stedi D3S HID globes to replace the factory ones. Jeep were quoting $485 for one, plus fitting, these were $139 a pair, just had to fit them myself.
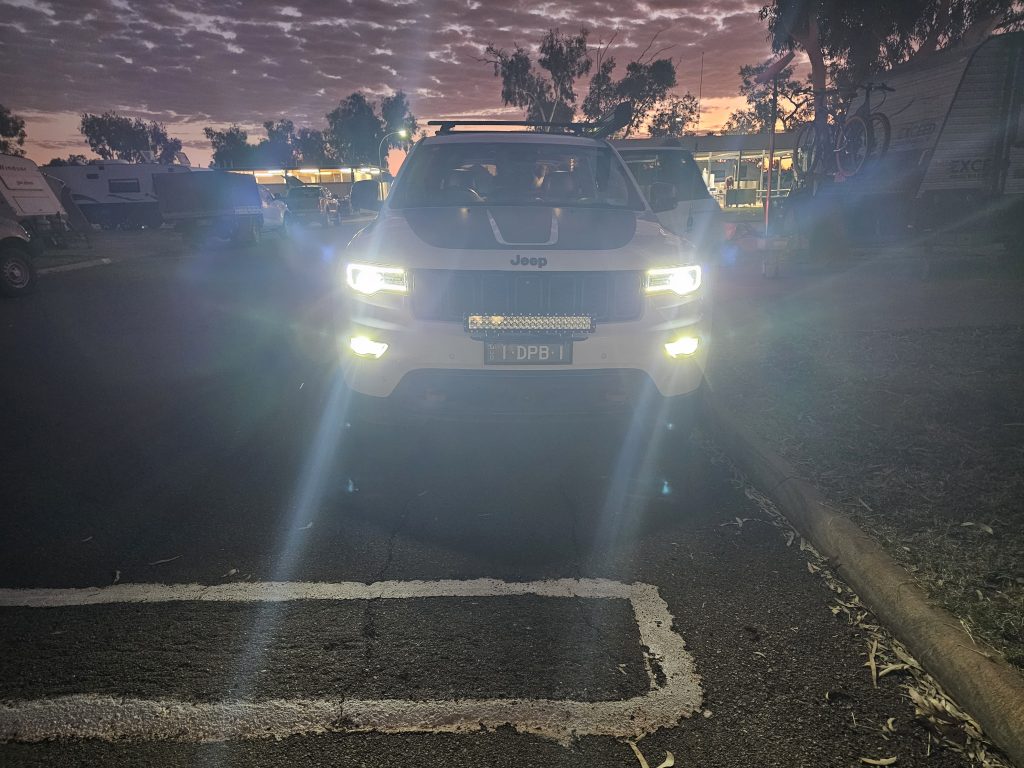
Replaced the dead globe first and very impressed with the colour and brightness so replaced the other (was always planning to). These are 5500K colour and match the factory LED fog lights and LED Parking lights perfectly. The factory original are only 4000K and much more orange. The Stedi globes are also 2800 Lumens and factory are 2000. The reason for the 2000 lumen limit on the factory globes, is they require self levelling and washers fitted if over 2000 lumens under Australian rules. However, the Jeep already has self levelling headlamps and washers, so it’s not restricted to the default limit.
Installing them in the Jeep is a right pain, the designers should be made to do it! It’s all by feel as you can’t see anything. To be able to get in there, you have to remove the air filter on the passenger side, and the driver side unbolt the radiator expansion tank and unclipped the main computer and slide it up and out, then hold them back out of the way with a strap (this is on the Diesel). I used an occy strap and pulled them back across the motor to some mounts for the air-conditioning lines.
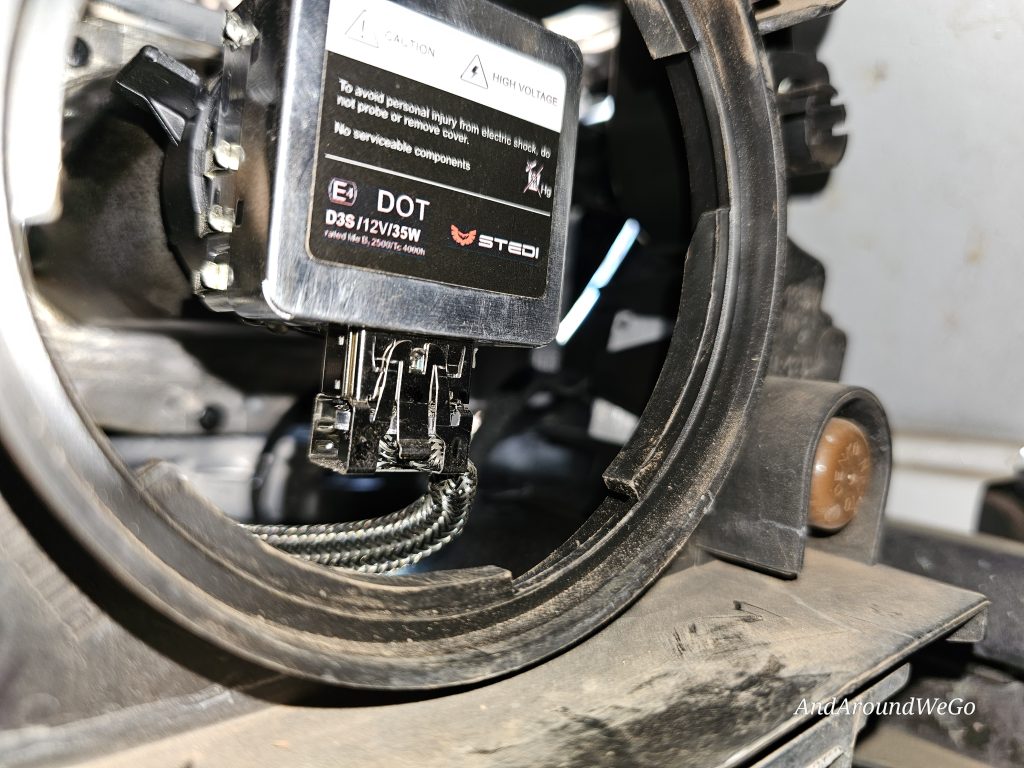
Then on the back of the headlight remove the water proofing cap by turning a little anticlockwise (then pull, can be tight as has a rubber seal), remove the power cable from the globe (there is a tiny tab that you push in on the lower part of the side facing the engine bay, but generally wriggling it while gently pulling down works – you can see that in the photo), then turn the locking tab holding the globe in anticlockwise (it’s just a single flap out to the side of the globe and forward of the square body and can be quite hard to move and only moves about 10 to 15mm), and finally remove the globe by pulling straight out with a little wriggle, it is a firm fit as appears to be in a rubber seal/ holder. You can see the tab for the locking ring in the photo.
Replacement is the reverse and the hardest is fitting the cable back onto the globe. Make sure to not touch the glass of the globes, oils deposited on the glass from your skin will cause the glass to break when hot. I wore disposable latex gloves to also try and keep the blood from dripping on the engine bay… (As it turned out the scratches were small enough that no blood dripped…) EDIT… turns out the twisting and stupid angles your arms get into I have ended up with bloody painful tendonitis in the right elbow! A month later still painful…
And remember, all this is done by feel and with only one hand (2 hands won’t fit and the one hand blocks all view of the area.)
Very happy with results, a little brighter than OEM but perfect colour match. Highly recommend the Stedi globes – as a bonus they are only $139 a PAIR delivered.
While I was on the Stedi website, decided it was time to pension off the cheap light bar I bought in a hurry before we left and replace with something that actually works. Besides, the plastic cover was starting to crack and if it ever rained I am sure water would have gotten through.
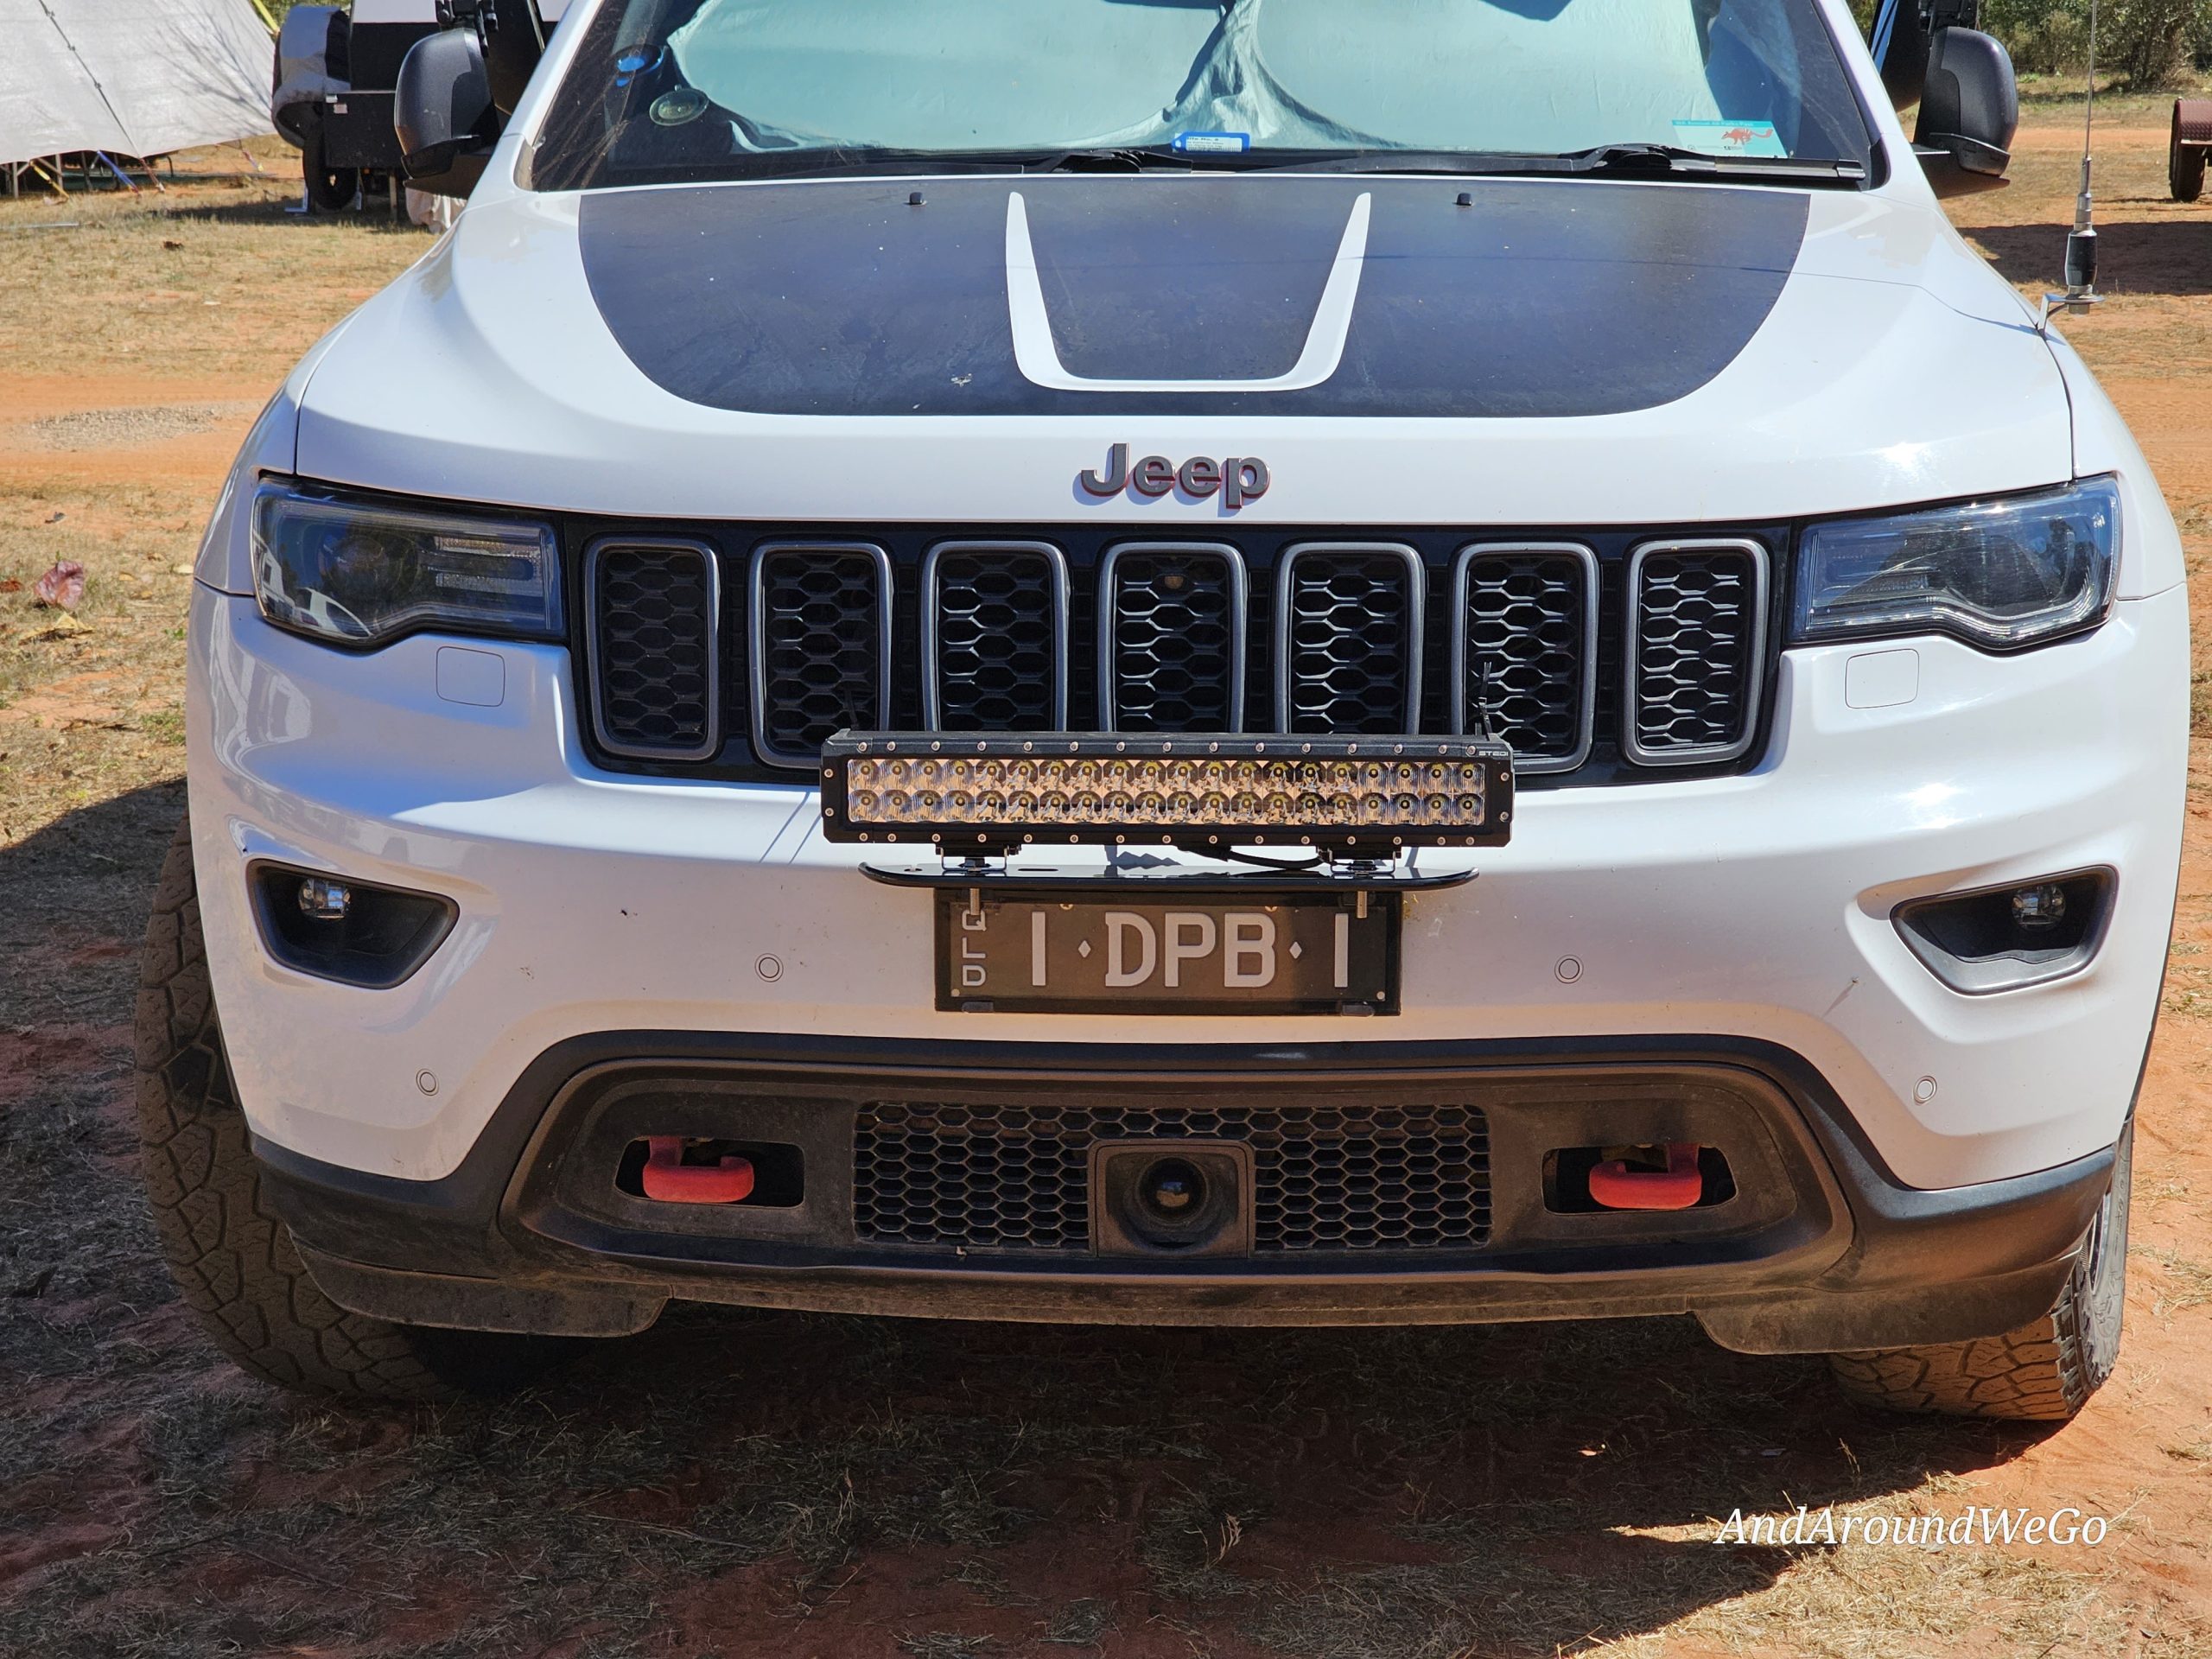
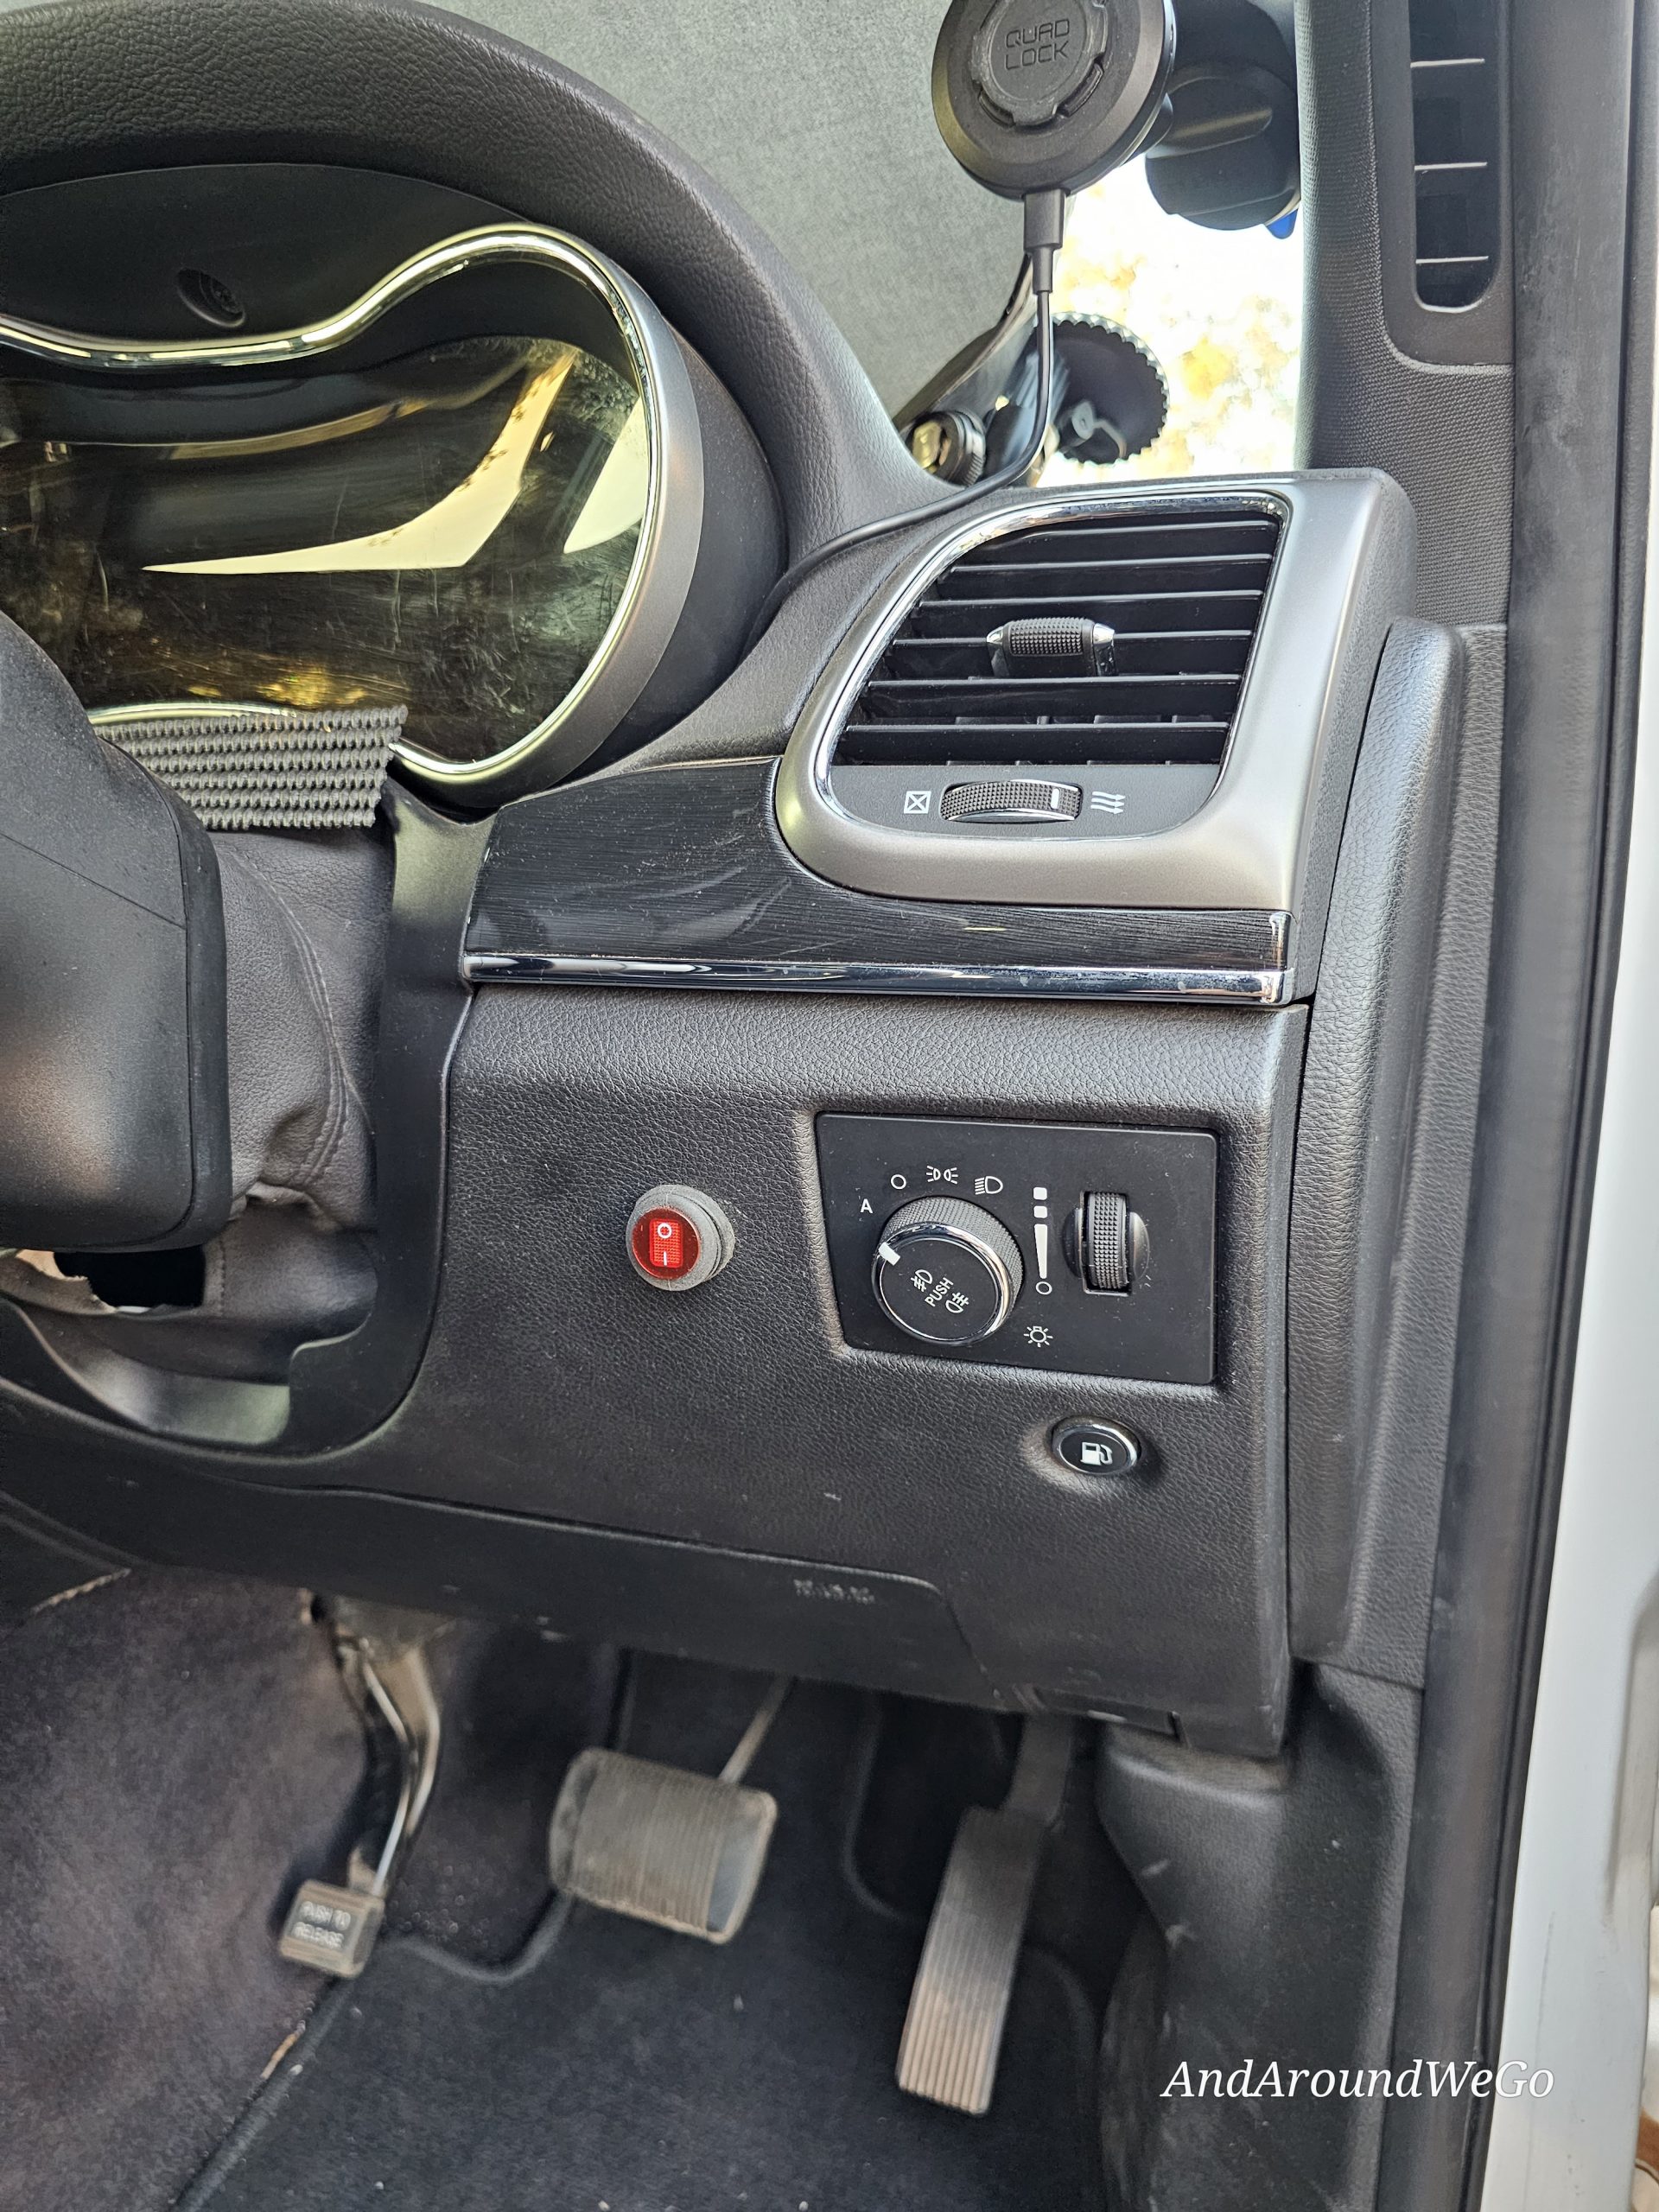
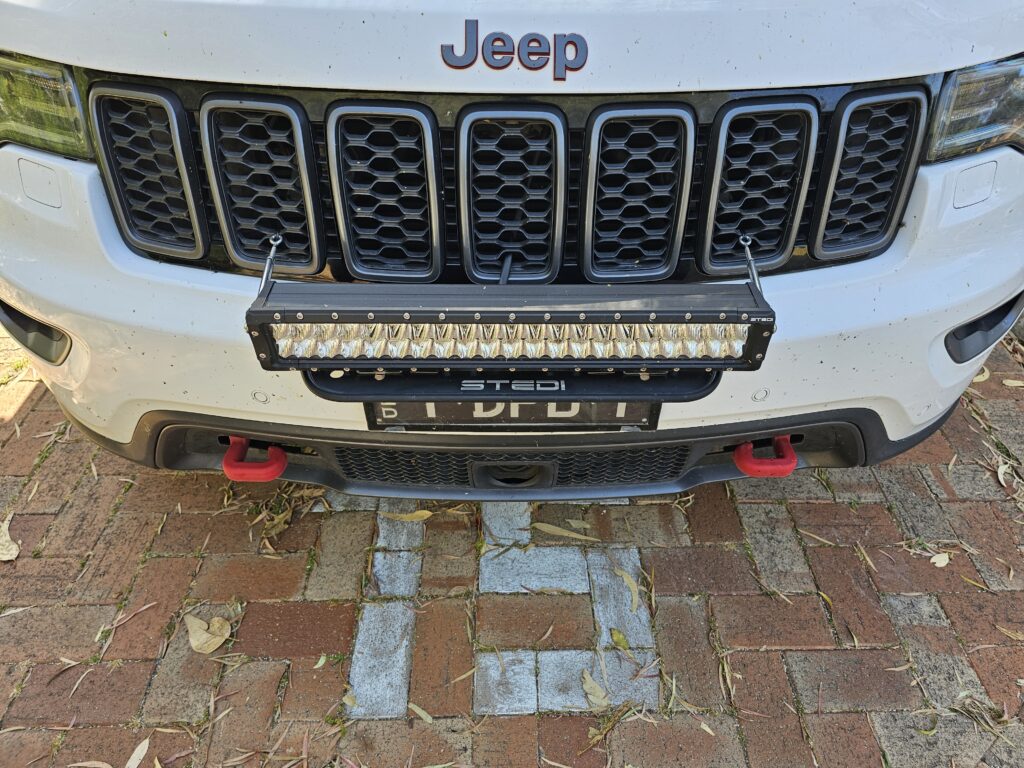
I looked at them all and decided the best bang for my buck and the largest I could get away with on a number plate mount was the 22in double row ST4K. After pulling al the old stuff off, I removed the 20 amp relay and replaced with the Stedi 60amp relay an new cabling that came with it. Since it had a new round switch, I decided that would be perfect to fill the hole near the headlight switch that used to have the TowPro Brake Controller knob (I relocated that to the Centre Console).
The new Stedi Number plate bracket was a lot stronger and heavier than the old cheap one, and the light was a lot heavier (2.75kg all up). So instead of just 4 screws into the bumper, I removed the lower skirt to get my hand up behind it and fitted 3 x 5mm stainless steel bolts with 30mm round washers on the inside, 2 across the bottom and one in the centre at the top, then 2 large stainless steel screws on th top as well for the number plate. A lot sturdier and not falling off in a hurry. The number plate bracket also has 2 strips of double sided tape to hold it still (sticks really well too – had to pull it off when I decided to change to bolts and that was not easy!). Number plate also has double sided tape holding it to the bracket as well as the screws – a couple of washers under the screws too to space it out enough for the number plate cover clips.
Absolutely stoked with the light output, the original was 2500 lumens, this is 9500 lumens (see video from Stedi below)…

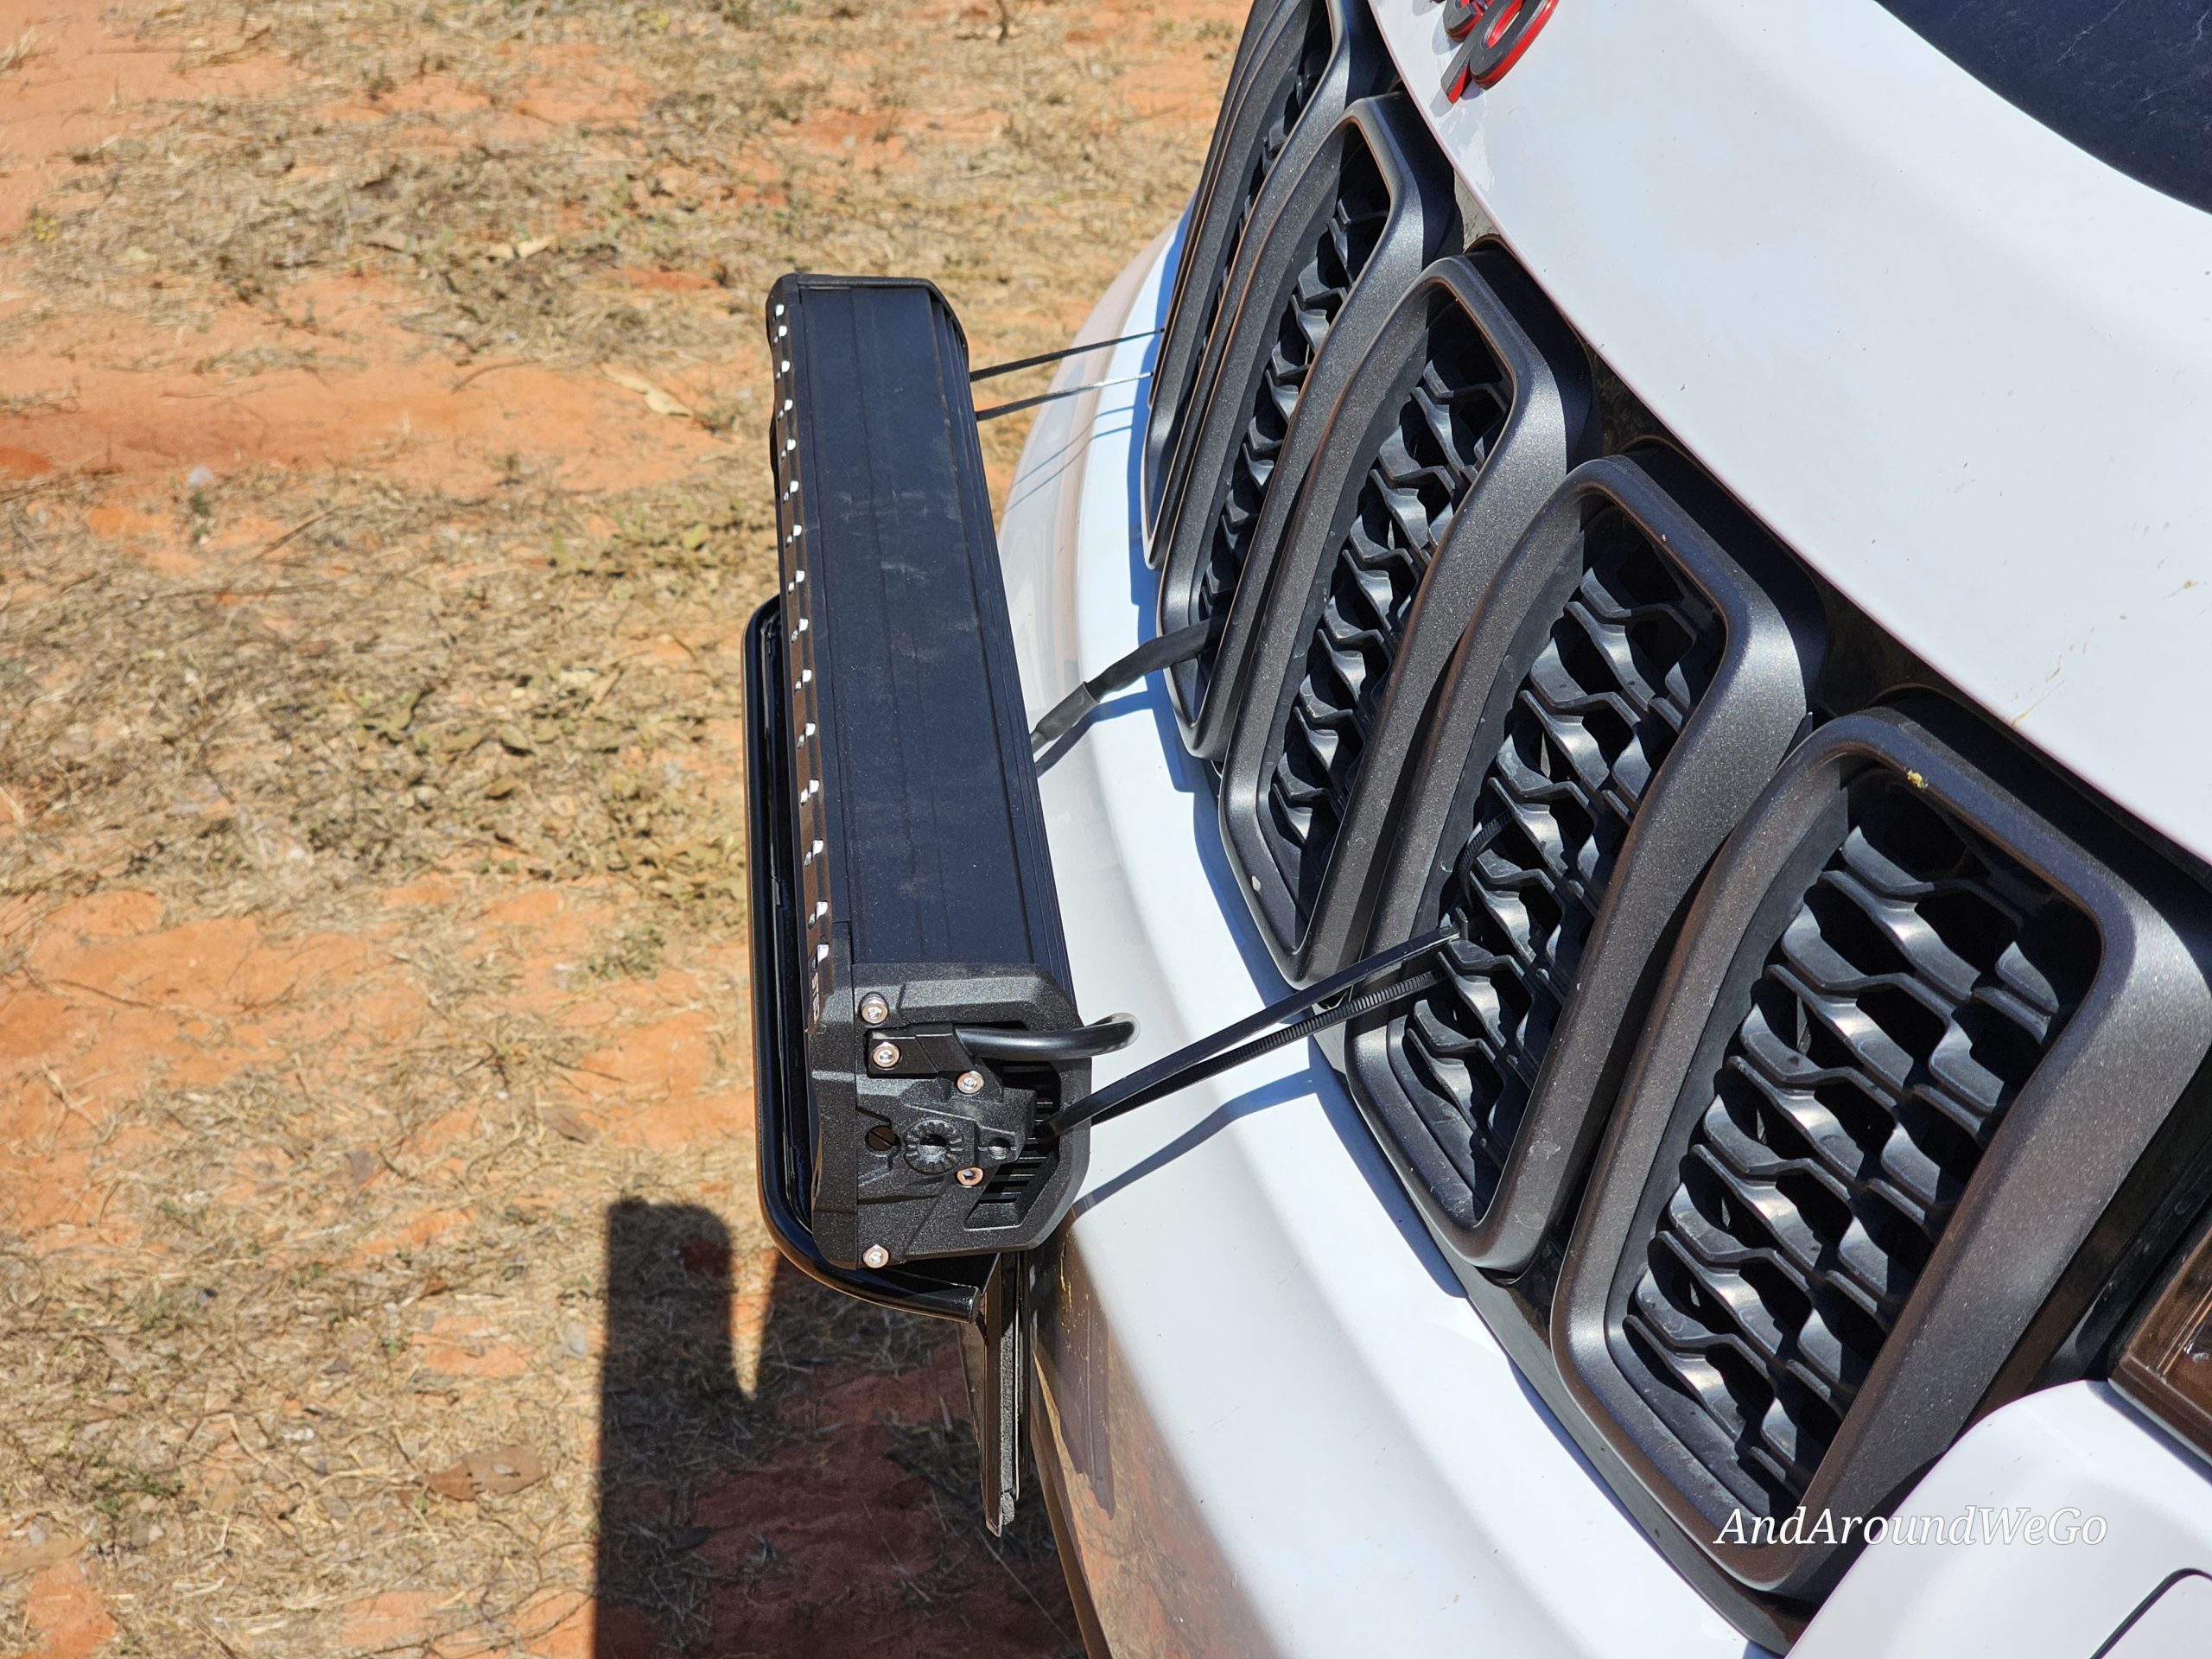
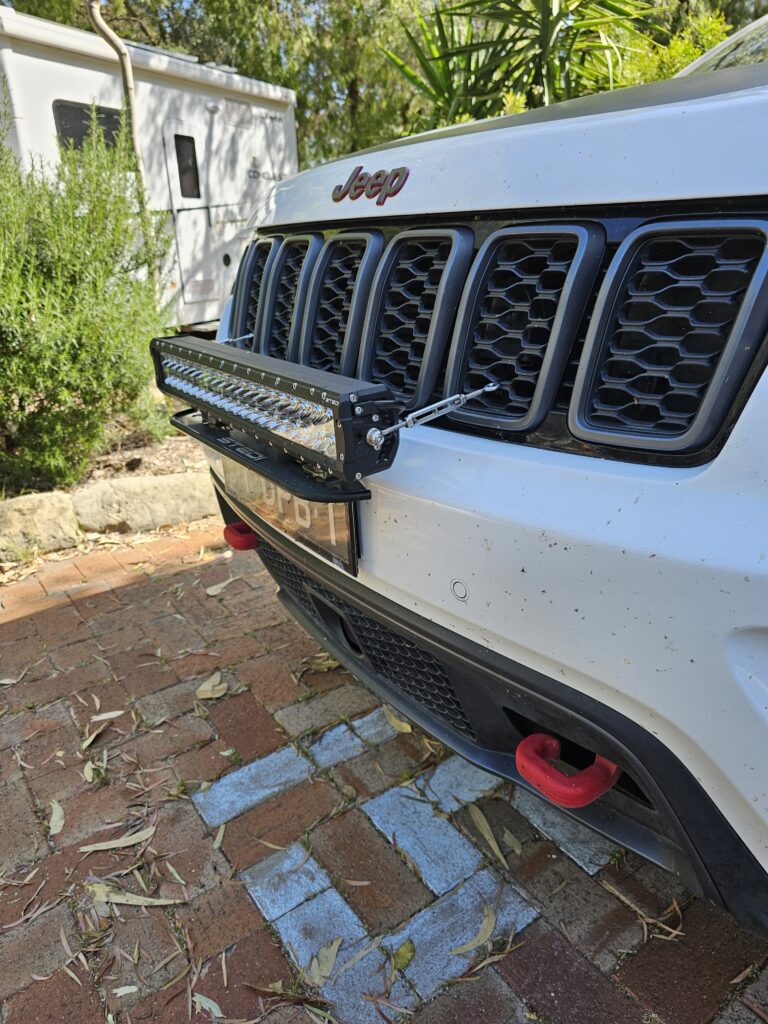
You might notice I have cable ties from the light bar to the grill – this is to reduce wobbles in the light pattern and works OK. I will get hold of some stainless steel turnbuckles and attach to the side of the light and the grill for better long term stability.
UPDATE: Told you I would fix it properly… Now using 5mm stainless steel turnbuckles from Bunnings, only a couple of dollars each. These didn’t have lock nuts, so a bit of locktite to hold them in place. Currently only cable tied to the grill to see if they did what I wanted, and yep, perfectly stable now. I have some 4mm wide stainless steel cable ties I will use when I notice one of them break! Or, I may even dorp them to the bottom of the grill inserts and screw them down. Will see.
This is not my video, this is from Stedi – first low beam, then high beam, then the 22in light bar. This was enough for me to pull the trigger.
Recent Comments